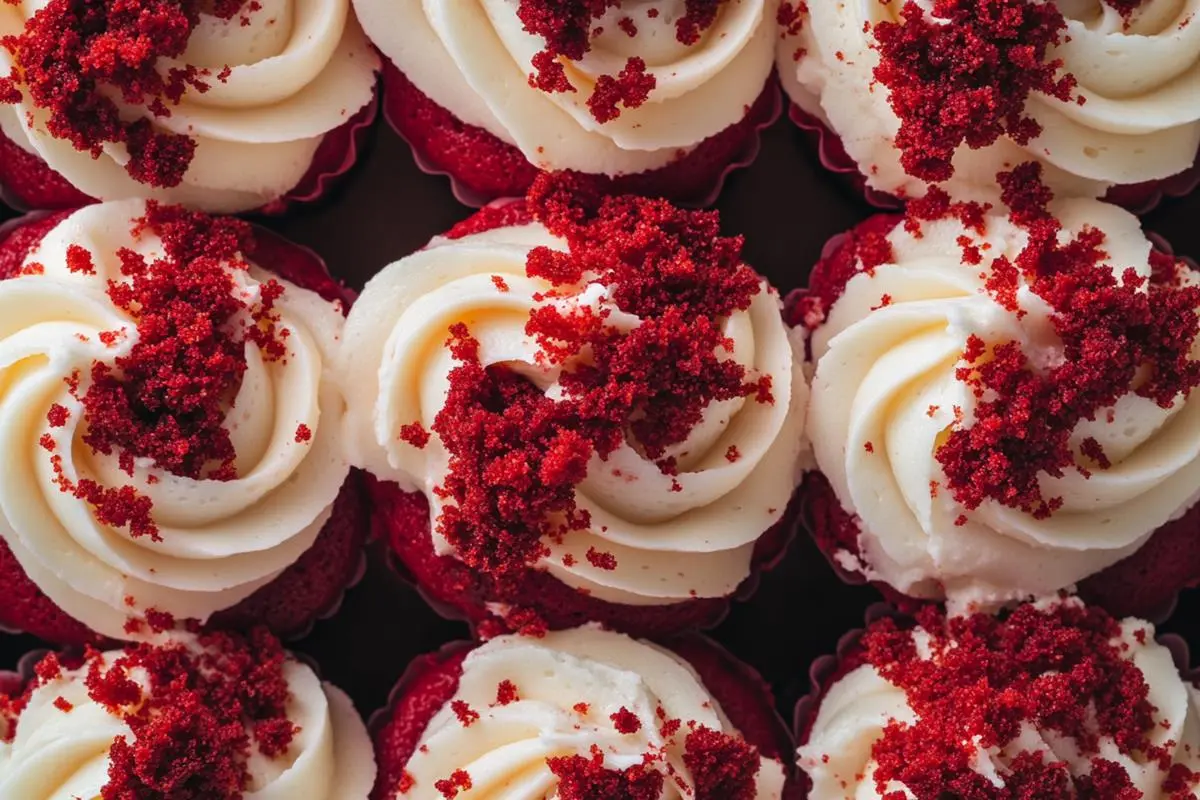
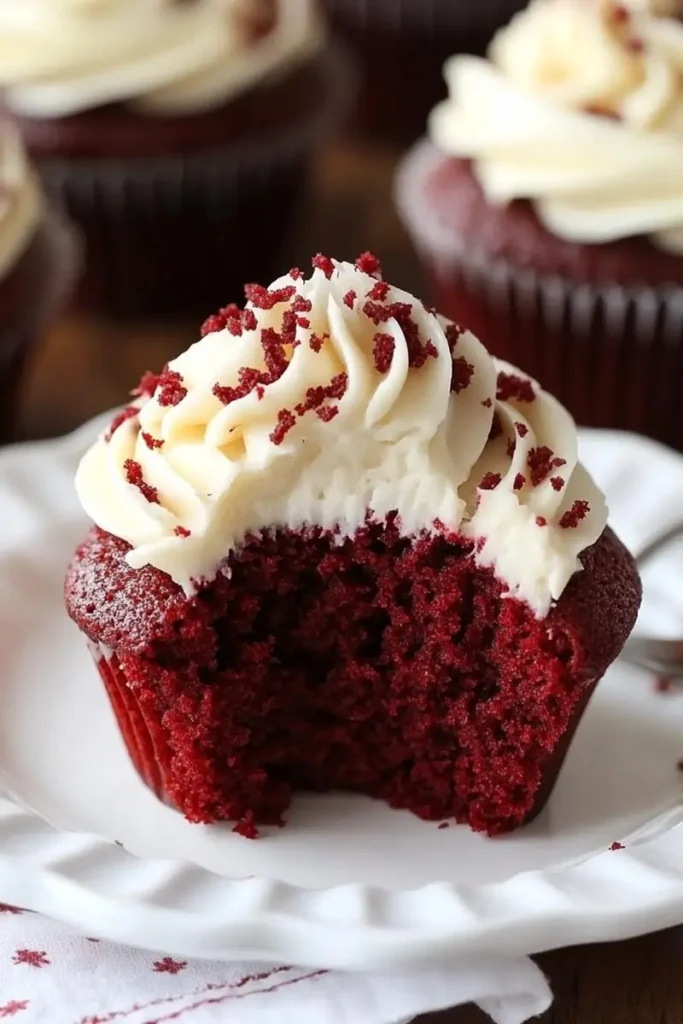
Red velvet cupcakes are a timeless treat, known for their vibrant red color, subtle cocoa flavor, and irresistibly moist texture. Topped with a creamy, tangy frosting, these cupcakes strike the perfect balance between sweet and slightly tangy flavors. Whether you’re baking for a birthday, holiday, or just to satisfy a sweet craving, this red velvet cupcake recipe is guaranteed to impress.
But what makes red velvet cupcakes different from regular chocolate or vanilla cupcakes? The secret lies in the ingredients—buttermilk, a touch of cocoa, and vinegar create a unique flavor and texture that sets them apart.
In this ultimate guide, you’ll learn everything you need to know to make perfectly soft, flavorful, and beautifully frosted red velvet cupcakes at home. From choosing the right ingredients to avoiding common baking mistakes, we’ll cover it all.
Now, let’s start with a little background on these beloved red velvet cupcakes!
Table of Contents
What Are Red Velvet Cupcakes?
Red velvet cupcakes are more than just their eye-catching red color—they have a distinct flavor and texture that set them apart from regular chocolate or vanilla cupcakes. Their soft, moist crumb and subtle cocoa flavor are enhanced by a hint of tanginess from buttermilk and vinegar. But what’s the story behind these famous treats?
The History of Red Velvet Cupcakes
The origins of red velvet cake date back to the early 1900s, but its exact history is debated. Some believe it was first introduced in Victorian-era kitchens, where “velvet cakes” were popular for their smooth texture. Others trace it to the Waldorf-Astoria Hotel in New York, where a version of the cake became famous in the 1920s.
During World War II, when cocoa was scarce, bakers used beet juice to enhance the cake’s color and moisture. Over time, food coloring replaced beet juice, giving red velvet its signature bold hue. Today, red velvet cupcakes are a beloved dessert for special occasions, from weddings to holiday celebrations.
What Makes Red Velvet Cupcakes Different?
Red velvet cupcakes are often mistaken for chocolate cupcakes, but they have key differences:
| Feature | Red Velvet Cupcakes | Chocolate Cupcakes |
|---|---|---|
| Flavor | Mild cocoa with a tangy, buttery taste | Rich, deep chocolate flavor |
| Texture | Soft, moist, and slightly dense | Moist but typically lighter |
| Key Ingredients | Buttermilk, vinegar, and a small amount of cocoa | More cocoa powder and no acidic ingredients |
| Color | Vibrant red (from food coloring or natural ingredients) | Dark brown from cocoa powder |
The combination of cocoa, acid, and dairy gives red velvet its unique taste—not quite chocolate, not quite vanilla, but somewhere in between.
Learn more about Red Velvet Cake Mix Cookies: The Ultimate Guide to Soft & Chewy Treats
Essential Ingredients for the Perfect Red Velvet Cupcakes
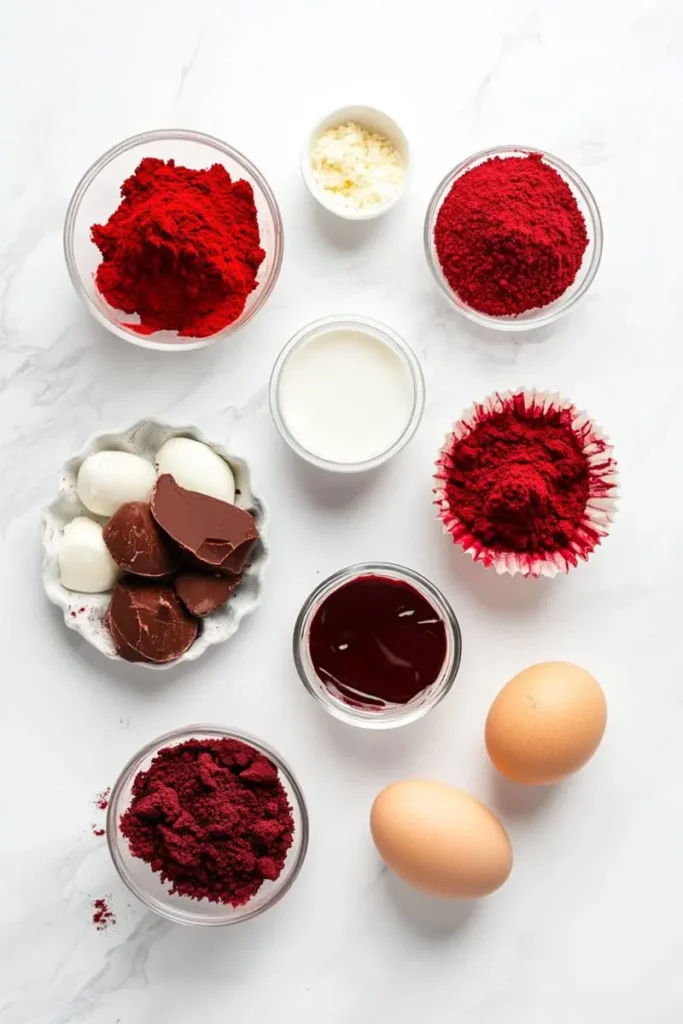
Creating the perfect red velvet cupcakes starts with the right ingredients. Each component plays a crucial role in achieving the signature texture, flavor, and color. Let’s break down the key ingredients and why they matter.
The Role of Buttermilk and Vinegar
One of the defining characteristics of red velvet cupcakes is their slightly tangy flavor and soft, tender crumb. This comes from the combination of buttermilk and vinegar, which work together to:
- Enhance Moisture – Buttermilk adds richness and helps keep the cupcakes soft.
- Activate Baking Soda – The acidity reacts with baking soda to create a light, fluffy texture.
- Balance the Sweetness – The tangy notes prevent the cupcakes from tasting overly sweet.
Substitutes for Buttermilk: If you don’t have buttermilk, you can make a quick substitute:
- Mix 1 cup of milk with 1 tablespoon of lemon juice or vinegar and let it sit for 5 minutes.
Choosing the Right Cocoa Powder
Red velvet cupcakes contain just a hint of cocoa powder, giving them a mild chocolate flavor without overpowering the tanginess. The best choice is unsweetened natural cocoa powder, which:
✔️ Reacts with acidic ingredients to enhance texture.
✔️ Adds depth to the overall flavor.
✔️ Helps create a deep red color when combined with food coloring.
Avoid Dutch-processed cocoa because it has been treated with an alkaline solution, which neutralizes the acidity needed for the proper red velvet reaction.
Why Is Red Food Coloring Used?
The bright red hue of these cupcakes originally came from a chemical reaction between natural cocoa powder and acidic ingredients. However, modern cocoa lacks this reaction, so red food coloring is often used to achieve the classic color.
Types of food coloring to use:
- Liquid food coloring – A few drops can enhance the red shade.
- Gel food coloring – More concentrated, so you need less to get a bold red color.
- Natural alternatives – Beetroot powder or pomegranate juice can provide a natural red tint.
💡 Pro Tip: If using natural colorants, keep in mind that the shade may be more muted than traditional food dyes.
Discover great ideas like The Best Italian Lemon Cake in Plano – A Must-Try Dessert
Step-by-Step Guide to Making Red Velvet Cupcakes
Now that you know the essential ingredients, it’s time to put them to work! Follow this step-by-step guide to bake the softest, most flavorful red velvet cupcakes from scratch.
Step 1: Gather Your Ingredients
Here’s what you’ll need:
For the Cupcakes
- 1 ¼ cups (160g) all-purpose flour
- 1 tablespoon unsweetened natural cocoa powder
- ½ teaspoon baking soda
- ¼ teaspoon salt
- ½ cup (113g) unsalted butter, softened
- ¾ cup (150g) granulated sugar
- 1 large egg
- ½ cup (120ml) buttermilk
- 1 teaspoon vanilla extract
- 1 teaspoon white vinegar
- 1 tablespoon red food coloring (liquid or gel)
For the Frosting (Classic Cream Cheese Frosting)
- 8 oz (226g) cream cheese, softened
- ½ cup (113g) unsalted butter, softened
- 2 cups (240g) powdered sugar
- 1 teaspoon vanilla extract
Step 2: Prepare Your Equipment
- Preheat your oven to 350°F (175°C).
- Line a 12-cup muffin tin with paper liners.
- If using a stand mixer, attach the paddle attachment for a smooth batter.
Step 3: Mix the Dry Ingredients
In a medium bowl, whisk together:
✔️ Flour
✔️ Cocoa powder
✔️ Baking soda
✔️ Salt
This ensures even distribution of ingredients and prevents clumps.
Step 4: Cream the Butter and Sugar
1️⃣ In a separate mixing bowl, beat the softened butter and sugar on medium speed until light and fluffy (about 2 minutes).
2️⃣ Add the egg and mix until fully incorporated.
💡 Pro Tip: Beating butter and sugar together introduces air into the batter, making the cupcakes lighter and fluffier.
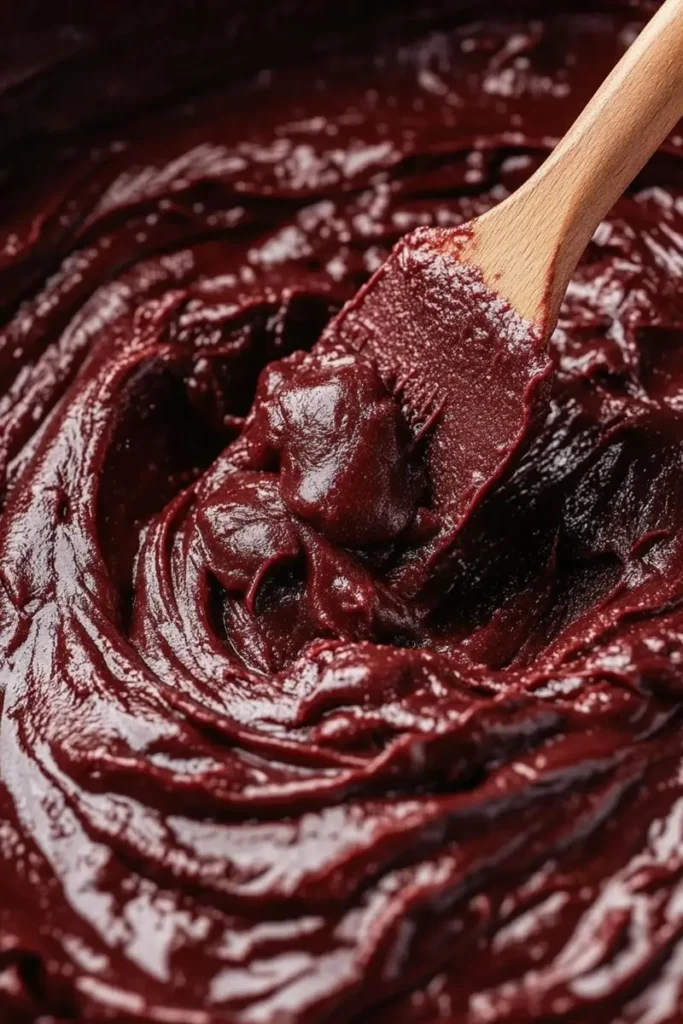
Step 5: Combine Wet Ingredients
1️⃣ In a small bowl, mix together:
✔️ Buttermilk
✔️ Vanilla extract
✔️ White vinegar
✔️ Red food coloring
2️⃣ Add half of this mixture to the butter and sugar mixture, then mix.
3️⃣ Add half of the dry ingredients and mix until just combined.
4️⃣ Repeat with the remaining wet and dry ingredients.
💡 Do not overmix—overworking the batter can make the cupcakes dense instead of light and airy.
Step 6: Fill the Cupcake Liners
1️⃣ Using an ice cream scoop or spoon, divide the batter evenly into the cupcake liners.
2️⃣ Fill each liner about 2/3 full to allow room for rising.
Step 7: Bake the Cupcakes
- Place the muffin tin in the preheated oven.
- Bake for 18-20 minutes, or until a toothpick inserted in the center comes out clean.
- Let the cupcakes cool in the pan for 5 minutes, then transfer them to a wire rack to cool completely before frosting.
Step 8: Make the Cream Cheese Frosting
1️⃣ Beat the cream cheese and butter together until smooth.
2️⃣ Add powdered sugar gradually, beating on low speed at first, then increasing to medium.
3️⃣ Add vanilla extract and beat until fluffy.
💡 If the frosting is too soft, chill it for 15-20 minutes before piping.
Step 9: Frost and Decorate
- Use a piping bag with a star tip to create beautiful swirls.
- Garnish with red velvet crumbs, chocolate shavings, or sprinkles for extra flair.
✅ Your homemade red velvet cupcakes are now ready to enjoy!
Check out Best Braunschweiger Dip Recipe – A Creamy Classic for Every Occasion
The Best Frosting for Red Velvet Cupcakes
The perfect red velvet cupcake isn’t complete without a rich and creamy frosting. The classic choice is cream cheese frosting, but there are other delicious alternatives that pair just as well. Let’s explore the best options!
Classic Cream Cheese Frosting (Best Choice!)
Cream cheese frosting is the most traditional topping for red velvet cupcakes. Its tangy, smooth, and slightly sweet flavor perfectly complements the subtle cocoa taste of the cupcakes.
Ingredients:
- 8 oz (226g) cream cheese, softened
- ½ cup (113g) unsalted butter, softened
- 2 cups (240g) powdered sugar
- 1 teaspoon vanilla extract
Instructions:
1️⃣ In a large bowl, beat the cream cheese and butter together until smooth.
2️⃣ Gradually add the powdered sugar, mixing on low speed at first.
3️⃣ Add the vanilla extract and beat until light and fluffy.
4️⃣ Chill for 15 minutes if needed, then pipe onto cooled cupcakes.
💡 Pro Tip: For an extra firm frosting, add ½ cup more powdered sugar or chill it before piping.
Alternative Frostings for Red Velvet Cupcakes
1. Fluffy Vanilla Buttercream (Sweeter & More Stable)
If you prefer a sweeter, sturdier frosting, vanilla buttercream is a great option.
Ingredients:
- 1 cup (226g) unsalted butter, softened
- 3 cups (360g) powdered sugar
- 2 teaspoons vanilla extract
- 2 tablespoons heavy cream
Instructions:
1️⃣ Beat butter until light and fluffy.
2️⃣ Add powdered sugar, one cup at a time, mixing well.
3️⃣ Stir in vanilla and heavy cream until smooth.
✔️ Best for piping detailed decorations.
✔️ Holds its shape well in warm temperatures.
2. Whipped Cream Frosting (Light & Airy)
If you want a less sweet, airy frosting, whipped cream is a fantastic choice.
Ingredients:
- 1 cup (240ml) heavy whipping cream
- ¼ cup (30g) powdered sugar
- 1 teaspoon vanilla extract
Instructions:
1️⃣ Beat the heavy cream and powdered sugar until stiff peaks form.
2️⃣ Add vanilla extract and mix gently.
✔️ Light and refreshing.
✔️ Pairs well with fruit toppings.
3. Chocolate Ganache Frosting (For a Rich Twist)
For a more decadent option, chocolate ganache adds a silky and luxurious finish to red velvet cupcakes.
Ingredients:
- 4 oz (113g) semi-sweet chocolate, chopped
- ½ cup (120ml) heavy cream
Instructions:
1️⃣ Heat heavy cream until hot but not boiling.
2️⃣ Pour over the chopped chocolate and let sit for 2 minutes.
3️⃣ Stir until smooth and glossy.
4️⃣ Let it cool slightly, then drizzle over cupcakes.
✔️ Perfect for chocolate lovers!
Best Frosting Choice for Your Occasion
| Frosting Type | Sweetness Level | Best For |
|---|---|---|
| Cream Cheese | Balanced | Classic red velvet pairing |
| Buttercream | Very sweet | Firm, decorative piping |
| Whipped Cream | Light & airy | Fresh, subtle sweetness |
| Chocolate Ganache | Rich & indulgent | A chocolate twist on red velvet |
Tips for Perfectly Moist and Fluffy Cupcakes
Making red velvet cupcakes that are light, fluffy, and moist requires more than just following a recipe—it’s about using the right techniques. Here are the best expert tips to ensure your cupcakes turn out perfect every time.
1. Measure Ingredients Accurately
Baking is a science, and the right balance of ingredients is crucial. Here’s how to measure correctly:
✔️ Use a kitchen scale for precision.
✔️ Spoon and level your flour—never scoop directly from the bag, as this packs in too much flour.
✔️ Measure liquid ingredients at eye level for accuracy.
💡 Tip: Too much flour makes cupcakes dense, while too little liquid makes them dry.
2. Use Room Temperature Ingredients
Cold ingredients don’t mix as well, leading to a dense texture. Make sure these ingredients are at room temperature before starting:
✔️ Butter
✔️ Eggs
✔️ Buttermilk
✔️ Cream cheese (for frosting)
💡 Tip: Forgot to take out the eggs? Place them in warm water for 5 minutes!
3. Don’t Overmix the Batter
Overmixing the batter can result in tough, chewy cupcakes. To avoid this:
✔️ Mix until just combined after adding dry ingredients.
✔️ Use a spatula instead of a mixer for the final stir.
✔️ The batter should be smooth but not overworked.
💡 Tip: Overmixing develops too much gluten, making the cupcakes dense.
4. Use the Right Baking Temperature
✔️ Bake at 350°F (175°C) for 18-20 minutes.
✔️ Preheat the oven properly—don’t rush!
✔️ Avoid opening the oven door too early, as this causes cupcakes to sink.
💡 Tip: If your cupcakes bake unevenly, try using an oven thermometer to check for temperature accuracy.
5. Fill Cupcake Liners Correctly
✔️ Fill each cupcake liner only 2/3 full.
✔️ Overfilling leads to overflowing or sunken centers.
✔️ Underfilling results in flat cupcakes.
💡 Tip: Use an ice cream scoop for consistent portioning.
6. Keep Cupcakes Moist with Simple Tricks
✔️ Don’t overbake—check doneness with a toothpick.
✔️ Store properly—keep them covered in an airtight container.
✔️ Add simple syrup—a light brush of sugar syrup keeps them moist longer.
💡 Tip: Cupcakes dry out faster in the fridge. If storing overnight, keep them at room temperature in a sealed container.
7. Cool Completely Before Frosting
✔️ Let cupcakes cool in the pan for 5 minutes, then transfer to a wire rack.
✔️ Frosting warm cupcakes melts the frosting and makes a mess.
💡 Tip: If in a rush, place cupcakes in the fridge for 15 minutes before frosting.
8. Test for Doneness the Right Way
✔️ Toothpick Test: Insert a toothpick in the center—if it comes out clean or with a few moist crumbs, they’re done.
✔️ Bounce Test: Gently press the top—if it springs back, they’re ready.
💡 Tip: If the toothpick comes out with wet batter, bake for 2 more minutes and recheck.
By following these expert tips, your red velvet cupcakes will be light, fluffy, and full of flavor every time!
Looking for inspiration? Try Explore More Dessert Recipes
Fun Variations of Red Velvet Cupcakes
Red velvet cupcakes are already a showstopper, but there are plenty of creative ways to elevate the classic recipe. Whether you want to add a surprise filling, make them healthier, or give them a unique twist, these variations will take your cupcakes to the next level!
1. Red Velvet Cupcakes with a Surprise Filling
Want to impress your guests? Add a surprise filling inside each cupcake for a fun and flavorful twist!
✔️ Cream Cheese Filling – Scoop out a small portion from the center of each cupcake and fill it with a sweetened cream cheese mixture.
✔️ Chocolate Ganache – Melt chocolate and heavy cream to make a rich ganache, then pipe it into the center for a chocolatey surprise.
✔️ Strawberry or Raspberry Jam – Adds a fruity contrast to the tangy red velvet flavor.
💡 Tip: Use a cupcake corer or a spoon to remove the center before filling.
2. Red Velvet Cupcakes with Oreo Crust
If you love Oreo cookies, try adding a crunchy Oreo base to your cupcakes!
How to Make It:
✔️ Place a whole Oreo cookie at the bottom of each cupcake liner.
✔️ Pour the red velvet batter over the cookie and bake as usual.
✔️ The cookie softens slightly while baking, creating a delicious, crunchy base.
💡 Best frosting: Top with cookies and cream frosting for an Oreo-inspired treat!
3. Vegan Red Velvet Cupcakes
For a dairy-free and egg-free version, try this vegan red velvet cupcake variation.
Ingredient Swaps:
✔️ Dairy-free milk + vinegar instead of buttermilk
✔️ Coconut oil or vegan butter instead of butter
✔️ Flax egg (1 tbsp flaxseed meal + 3 tbsp water) instead of egg
These swaps create moist, fluffy vegan cupcakes that taste just like the classic version!
💡 Tip: Use natural beet powder instead of food coloring for a plant-based red hue.
4. Gluten-Free Red Velvet Cupcakes
If you’re avoiding gluten, you can still enjoy red velvet cupcakes with a gluten-free twist.
✔️ Swap all-purpose flour with a 1:1 gluten-free flour blend.
✔️ Add ¼ teaspoon xanthan gum to improve texture.
✔️ Use almond flour + coconut flour for a nutty, gluten-free variation.
💡 Tip: Gluten-free cupcakes can be more delicate, so let them cool completely before frosting.
5. Red Velvet Cupcakes with Different Frosting Flavors
Want to change things up? Try these unique frosting options instead of the classic cream cheese frosting:
✔️ White Chocolate Frosting – Melted white chocolate mixed with buttercream for a creamy, sweet finish.
✔️ Peanut Butter Frosting – A salty-sweet contrast to the mild cocoa flavor of red velvet.
✔️ Coconut Whipped Cream – A dairy-free, light option that complements the tangy cupcake base.
💡 Tip: Experiment with colorful frosting swirls by mixing different shades together in a piping bag!
6. Red Velvet Cupcake Milkshake
Turn leftover cupcakes into a delicious milkshake!
How to Make It:
✔️ Blend 2 red velvet cupcakes with 1 cup vanilla ice cream and ½ cup milk.
✔️ Add a dollop of cream cheese frosting on top.
✔️ Garnish with red velvet crumbs and a drizzle of chocolate sauce.
💡 Tip: This works great with day-old cupcakes that need a fresh twist!
7. Mini Red Velvet Cupcakes for Bite-Sized Treats
Want something small and snackable? Make mini red velvet cupcakes for parties or events.
✔️ Use a mini muffin pan and mini liners.
✔️ Reduce baking time to 10-12 minutes.
✔️ Pipe tiny cream cheese swirls for a cute presentation.
💡 Perfect for: Baby showers, weddings, or dessert platters!
Which Variation Will You Try First?
With so many fun red velvet cupcake variations, there’s always a new way to enjoy this classic dessert. Whether you prefer a chocolate-filled surprise, a healthier twist, or a unique frosting, these ideas will make your cupcakes stand out!
Common Mistakes and How to Fix Them
Even experienced bakers can run into problems when making red velvet cupcakes. If your cupcakes turn out too dry, brown instead of red, or sink in the middle, don’t worry! Here are the most common mistakes and how to fix them.
1. Why Did My Cupcakes Turn Brown Instead of Red?
One of the biggest disappointments when baking red velvet cupcakes is when they lose their vibrant color and turn brown. Here’s why it happens:
✔ Using Dutch-Processed Cocoa – This type of cocoa is alkaline and doesn’t react properly with the acidic ingredients, dulling the red color.
✔ Not Enough Food Coloring – If you use too little coloring, the cocoa powder will overpower the red. Use gel food coloring for a bold red shade.
✔ Baking at a Too-High Temperature – High heat can darken the batter, reducing the red hue. Stick to 350°F (175°C) for even baking.
💡 Fix It: Use natural cocoa powder and gel food coloring instead of liquid dye for a richer, more intense red color.
2. Why Are My Cupcakes Dry?
Dry cupcakes usually result from one of the following issues:
✔ Overbaking – Even 2 extra minutes in the oven can dry them out. Check for doneness at 18 minutes with a toothpick.
✔ Too Much Flour – If you scoop flour directly from the bag, you may be using more than needed. Always spoon and level your flour.
✔ Not Enough Buttermilk or Fat – Buttermilk and butter keep the cupcakes moist. Don’t reduce these ingredients!
💡 Fix It: If your cupcakes are already dry, brush them with a simple syrup (equal parts sugar and water heated together) to add moisture back.
3. Why Are My Cupcakes Dense and Heavy?
Dense cupcakes often happen due to overmixing or incorrect ingredient ratios.
✔ Overmixing the Batter – Overmixing develops too much gluten, making the cupcakes chewy. Mix until just combined.
✔ Not Enough Leavening – Baking soda and vinegar work together to create a fluffy texture. If you accidentally skip one, your cupcakes won’t rise properly.
✔ Cold Ingredients – Butter, eggs, and buttermilk should be at room temperature for a smooth batter.
💡 Fix It: Next time, mix gently and use room-temperature ingredients to keep your cupcakes light and fluffy.
4. How Do I Prevent My Cupcakes from Sinking in the Middle?
Sunken cupcakes usually result from too much air in the batter or improper baking.
✔ Overbeating Butter and Sugar – This can create air pockets that collapse during baking. Beat until just fluffy, not overly whipped.
✔ Opening the Oven Door Too Early – Sudden temperature changes can cause cupcakes to fall. Check only after 15 minutes.
✔ Underbaking – Cupcakes need to be fully set before coming out of the oven. If underbaked, they’ll collapse as they cool.
💡 Fix It: Use an oven thermometer to ensure accurate baking temperatures, and don’t open the oven door too soon!
5. Why Is My Frosting Too Runny?
Runny frosting won’t hold its shape when piped. Here’s what might have gone wrong:
✔ Cream Cheese or Butter Was Too Soft – If your butter or cream cheese is too warm, the frosting will be loose.
✔ Too Much Liquid – Adding extra vanilla, milk, or cream can make the frosting too thin.
✔ Not Enough Powdered Sugar – Sugar helps thicken frosting. If you don’t use enough, the frosting won’t firm up.
💡 Fix It: Refrigerate the frosting for 15-20 minutes, then whip it again. If it’s still too soft, add ¼ cup more powdered sugar at a time until it reaches the right consistency.
6. Why Do My Cupcakes Stick to the Liners?
It’s frustrating when half of your cupcake stays stuck to the paper liner. Here’s why it happens:
✔ Using Cheap Liners – Thin or low-quality liners tend to stick. Use greaseproof liners for best results.
✔ Not Enough Fat in the Batter – Butter helps cupcakes release from the liners. Avoid reducing the butter amount.
✔ Removing Liners Too Soon – Cupcakes need to cool completely before peeling off the liner.
💡 Fix It: Try lightly spraying liners with nonstick spray before adding the batter.
7. Why Do My Cupcakes Have a Domed or Flat Top?
✔ Domed Tops: This happens when the oven is too hot or there’s too much leavening.
✔ Flat Tops: This can occur if there’s too little leavening or if the batter is overmixed.
💡 Fix It: Bake at the correct temperature (350°F/175°C) and measure baking soda accurately to get a perfect cupcake shape.
By avoiding these common baking mistakes, you’ll be on your way to baking perfectly moist, fluffy, and vibrant red velvet cupcakes every time!
PART 8: Serving and Storing Red Velvet Cupcakes
Red velvet cupcakes are best enjoyed fresh, but proper serving and storage techniques can keep them delicious for days. Whether you’re preparing them for a special event or saving leftovers, here’s how to serve and store them the right way.
1. The Best Way to Serve Red Velvet Cupcakes
Red velvet cupcakes taste best when they are slightly chilled or at room temperature. Here’s how to get the most out of their flavor and texture:
✔ Let them sit at room temperature for 20-30 minutes before serving if they’ve been refrigerated.
✔ Serve with a cold glass of milk, coffee, or tea for the perfect pairing.
✔ Garnish with red velvet crumbs, sprinkles, or chocolate shavings for an extra-special touch.
💡 Pro Tip: For an elegant dessert, serve cupcakes on a tiered stand with a drizzle of white chocolate sauce or fresh berries on the side.
2. How to Store Red Velvet Cupcakes
To keep your cupcakes moist and fresh, store them properly based on when you plan to eat them.
Short-Term Storage (Up to 2 Days)
✔ Store cupcakes at room temperature in an airtight container.
✔ Keep them away from direct sunlight or heat to prevent the frosting from melting.
✔ If unfrosted, store them in a sealed container to maintain their moisture.
💡 Avoid storing cupcakes in the fridge for short periods, as refrigeration can dry them out.
Refrigerating Red Velvet Cupcakes (Up to 5 Days)
✔ If the cupcakes are already frosted with cream cheese frosting, refrigeration is necessary.
✔ Place them in an airtight container to prevent drying out.
✔ Before serving, let them come to room temperature for 20-30 minutes.
💡 Pro Tip: To keep cupcakes extra moist in the fridge, place a slice of bread in the container—it helps retain moisture!
3. Can You Freeze Red Velvet Cupcakes?
Yes! Freezing is the best option if you want to make cupcakes ahead of time.
How to Freeze Unfrosted Cupcakes
✔ Let cupcakes cool completely before freezing to prevent condensation.
✔ Wrap each cupcake individually in plastic wrap to protect against freezer burn.
✔ Store them in a zip-top freezer bag or airtight container.
✔ Freeze for up to 3 months.
💡 To thaw: Remove from the freezer and let them sit at room temperature for 1-2 hours before frosting.
How to Freeze Frosted Cupcakes
✔ Place cupcakes on a baking sheet and freeze uncovered for 1 hour (this prevents the frosting from getting smushed).
✔ Once firm, wrap each cupcake in plastic wrap and place them in a freezer-safe container.
✔ Freeze for up to 3 months.
💡 To thaw: Transfer to the fridge overnight, then let them sit at room temperature before serving.
4. How to Transport Red Velvet Cupcakes
Bringing cupcakes to a party or event? Here’s how to keep them intact:
✔ Use a cupcake carrier with individual slots to prevent movement.
✔ If you don’t have a carrier, place cupcakes in a sturdy box and use aluminum foil or parchment paper between layers.
✔ Keep cupcakes cool during transport—avoid leaving them in a hot car.
💡 Pro Tip: If you need to travel long distances, freeze the cupcakes overnight and let them thaw during transport.
By following these storage and serving tips, your red velvet cupcakes will stay fresh, moist, and delicious no matter when you enjoy them!
PART 9: FAQs About Red Velvet Cupcakes
Got questions about red velvet cupcakes? Here are the most common FAQs and expert answers to help you perfect your baking skills.
1. Can I Make Red Velvet Cupcakes Without Food Coloring?
Yes! While food coloring gives red velvet cupcakes their signature hue, you can use natural alternatives or skip the color entirely.
✔ Natural options: Beetroot powder, pomegranate juice, or raspberry puree can create a reddish tint.
✔ If you skip food coloring, the cupcakes will have a more brownish-red or light cocoa color but will still taste the same.
💡 Pro Tip: Use natural cocoa powder instead of Dutch-processed cocoa for a naturally richer red tone.
2. What’s the Difference Between Red Velvet and Chocolate Cupcakes?
Red velvet cupcakes are often mistaken for chocolate cupcakes, but they have distinct differences.
| Feature | Red Velvet Cupcakes | Chocolate Cupcakes |
|---|---|---|
| Flavor | Mild cocoa with tangy buttermilk taste | Rich, deep chocolate flavor |
| Key Ingredients | Buttermilk, vinegar, light cocoa | More cocoa, no acidic ingredients |
| Texture | Soft, slightly dense, velvety | Moist, but typically fluffier |
| Color | Red (from food coloring or natural cocoa) | Dark brown |
💡 Key Takeaway: Red velvet cupcakes have less chocolate flavor and get their unique taste from buttermilk and vinegar.
3. How Do I Make My Cupcakes Extra Moist?
Moist cupcakes come down to the right ingredients and techniques.
✔ Use buttermilk and vinegar – They add moisture and create a tender crumb.
✔ Don’t overbake – Check with a toothpick at 18 minutes to avoid drying out.
✔ Add oil or extra butter – Replacing 2 tablespoons of butter with oil increases moisture.
✔ Store properly – Keep cupcakes in an airtight container to prevent drying.
💡 Bonus Tip: Brush cupcakes with a simple syrup (equal parts sugar and water) to lock in moisture after baking.
4. Can I Use Natural Food Coloring Instead of Artificial Dye?
Yes! If you prefer to avoid artificial dyes, try these natural alternatives:
✔ Beetroot powder – Adds a natural reddish-pink hue.
✔ Pomegranate juice – Enhances color with a slight fruity note.
✔ Raspberry or strawberry puree – Provides a mild red tint.
💡 Keep in Mind: Natural colorings won’t be as vibrant as artificial red dye, and some may slightly alter the taste.
5. What Is the Best Substitute for Buttermilk?
If you don’t have buttermilk, you can make a quick DIY version.
✔ Milk + Vinegar/Lemon Juice – Add 1 tablespoon of white vinegar or lemon juice to ½ cup of milk, stir, and let sit for 5 minutes.
✔ Greek Yogurt + Water/Milk – Mix ¼ cup Greek yogurt with ¼ cup water or milk for a similar effect.
✔ Sour Cream + Water – Combine equal parts sour cream and water to mimic buttermilk’s acidity.
💡 Why It Matters: Buttermilk reacts with baking soda to create a lighter, fluffier cupcake texture.
6. How Do I Prevent Cupcakes from Sinking in the Middle?
Sunken cupcakes are a common issue, but they’re easy to prevent with these tips:
✔ Don’t overmix the batter – Too much air creates weak structure, causing collapse.
✔ Check oven temperature – Too high or too low heat affects rise. Use an oven thermometer for accuracy.
✔ Bake fully – Underbaking leads to sinking. Cupcakes should spring back when touched lightly.
💡 Pro Tip: If your cupcakes still sink, try filling the liners only 2/3 full and avoid opening the oven door too soon.
Conclusion
Red velvet cupcakes are a timeless dessert loved for their moist texture, subtle cocoa flavor, and signature red color. Whether you’re making them for a special occasion or just to satisfy a sweet craving, following the right techniques ensures a perfect batch every time.
From choosing the best ingredients like buttermilk and vinegar to mastering baking techniques that keep cupcakes moist and fluffy, this guide has covered everything you need to know. Plus, with fun variations like filled cupcakes, gluten-free options, and unique frostings, you can customize red velvet cupcakes to suit any taste.
By avoiding common mistakes—like overbaking, overmixing, or using the wrong type of cocoa—you can achieve bakery-quality results right at home. And with proper storage tips, you’ll keep your cupcakes fresh for days or even months!
Now, it’s time to bake your own batch of red velvet cupcakes and enjoy this classic treat. Whether you stick to the traditional cream cheese frosting or experiment with different flavors, these cupcakes are sure to impress!
Looking for more baking inspiration? Check out our other dessert guides and recipes!
Follow us for more delicious recipes on Facebook: Rushing Recipes Facebook Page
Print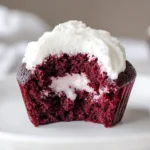
The Best Red Velvet Cupcakes Recipe: Moist, Fluffy & Delicious
- Total Time: 35 minutes
- Yield: 12 cupcakes 1x
- Diet: Vegetarian
Description
These classic Red Velvet Cupcakes are soft, moist, and topped with a rich cream cheese
Ingredients
- 1 1/4 cups all-purpose flour
- 1 cup granulated sugar
- 1/2 teaspoon baking soda
- 1/2 teaspoon salt
- 1/2 teaspoon cocoa powder
- 3/4 cup vegetable oil
- 1/2 cup buttermilk
- 1 large egg
- 1 tablespoon red food coloring
- 1/2 teaspoon vanilla extract
- 1/2 teaspoon white vinegar
For the frosting:
- 8 oz cream cheese
- 1/2 cup unsalted butter
- 2 cups powdered sugar
- 1 teaspoon vanilla extract
Instructions
- Preheat your oven to 350°F (175°C). Line a cupcake tin with paper liners.
- In a medium bowl, whisk together flour, sugar, baking soda, salt, and cocoa powder.
- In a separate bowl, mix vegetable oil, buttermilk, egg, food coloring, vanilla, and vinegar until well combined.
- Gradually add the dry ingredients to the wet ingredients, mixing until smooth.
- Divide the batter evenly among the cupcake liners, filling each about 2/3 full.
- Bake for 18-20 minutes or until a toothpick inserted comes out clean. Let cool completely.
- For the frosting: Beat cream cheese and butter until smooth. Gradually add powdered sugar and vanilla extract, beating until fluffy.
- Frost the cooled cupcakes and enjoy!
Notes
For extra flavor, add a pinch of cinnamon or top with white chocolate shavings!
Equipment Needed:
- Mixing Bowl
- Whisk
- Cupcake Tin
- Oven
- Piping Bag
- Prep Time: 15 minutes
- Cook Time: 20 minutes
- Category: Dessert
- Method: Baking
- Cuisine: American
Nutrition
- Serving Size: 1 cupcake
- Calories: 320
- Sugar: 24g
- Sodium: 180mg
- Fat: 18g
- Saturated Fat: 8g
- Unsaturated Fat: 9g
- Carbohydrates: 40g
- Fiber: 1g
- Protein: 4g
- Cholesterol: 35mg
Keywords: red velvet, cupcakes, dessert, baking